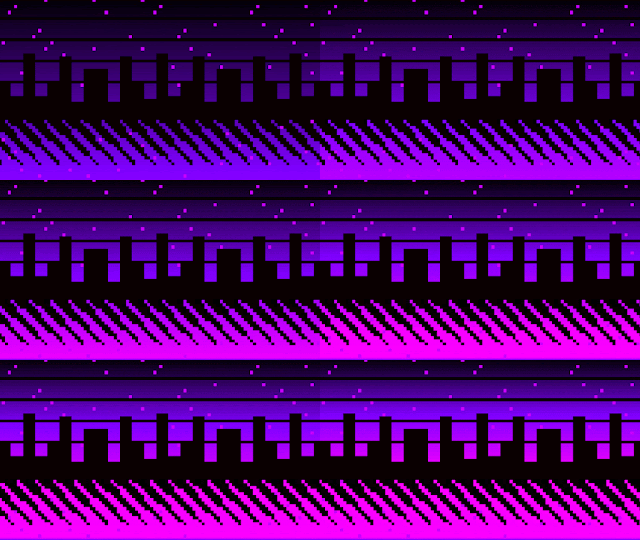
I love retro pixel art and 80s graphics in general. I also like to program in an old school way with bitwise operations and all that glam rock. I'm just telling this so you all would understand why this demo is so incredibly last season. Here we go again on our own...
1. Pixel array approach
When I do raycasting I often manipulate the Canvas ImageData array directly. For Dwitter demos that approach is not feasible because the calls to getImageData and putImageData take a lot of space. There is a way to simulate it though. We can use fillRect to draw each pixel on the screen separately and then control them either by setting color with fillStyle or by simply switching pixel width between 1 and 0 and doing black and white. This changes the way we look at drawing on screen as we are drawing every pixel by default and the logic will either define what not to draw or at what color. For the sake of simplicity, lets first look at the case of each pixel on screen being either drawn or not drawn and build our city skyline this way. We have the Dwitter boilerplate and all we need in addition is a tight loop that draws the screen full of small rects...
for(c.width=i=110;i--;)for(j=64;j--;)x.fillRect(i,j,1,1)
That should paint our whole screen black. Basically i is our screen x and j is screen y. If you change the width in fillRect to 0, the screen is left white. 0.5 will make it grey. Adding a conditional statement there lets us control the image. Just to show how it works here's how you'd do a flat horizon...
x.fillRect(i,j,j>32,1)
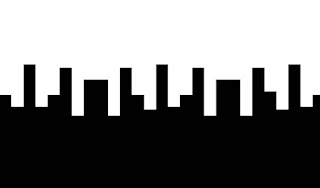
So if our current screen y coordinate is larger than 32 the width of the rect will be 1, otherwise 0. This results in only the lower half of the screen being black. Now lets get busy and do the silhouette of the buildings using this method...
2. Adding conditions
x.fillRect(i,j,j/9>3+S(i|3),1)
I'm quite proud of this little formula that gives us the city in 12 bytes. It's easier to read as j>27+S(i|3)*9 but we save an extra byte by scaling things down. The condition basically tells the browser to only draw when the current pixel is below our little sine wave. The blockiness is achieved with the bitwise OR operation. Now to something much more complex - adding the reflections on water...
x.fillRect(i,j,j/8<6+C(i-j-t)&j/9>3+S(i|3),1)
The idea is the same but we don't need the OR operation and we make the reflections angled by adding j to the mix. Well actually subtracting it but you get the idea. Variable t is elapsed time and gives us movement. We use the AND operator to make sure both conditions are met before we draw pixels. Seems to be working nicely and only 82 bytes spent in total. Time for details!
Many 80s computer graphics had wireframe grids vanishing to the horizon and a sun that had horizontal lines going over it. We will simplify this by just doing horizontal lines on the sky - again by adding a condition...
x.fillRect(i,j,j/8<6+C(i-j-t)&(j/9>3+S(i|3)|j%7<1),1)
Only 8 more bytes thanks to the modulus operator! We don't want the lines on water so we need to combine our new condition with our building condition. This requires adding parenthesis. We use the bitwise OR to draw if either condition is true. Notice what a big difference these horizontal lines make in making the image recognizable. Up next, the stars...
x.fillRect(i,j,j/8<6+C(i-j-t)&(j/9>3+S(i|3)|j%7<1)|!(1+j*i&79),1)
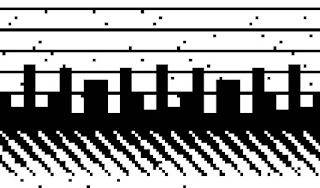
12 bytes for a starry sky that reflects on the ocean isn't all that bad. We multiply our x and y coordinates and use some bitwise magic to scatter the stars all over the screen. The logical NOT operator turns the result of our formula into 1 if it's anything other than 0. You might wonder why we add one in the beginning - that's so we don't get a vertical black line on our left edge when we are multiplying zero with zero. Now we have added 4 layers of fairly short conditions. With these rules the end results is a 102 byte black and white version of the demo. I used the remaining space to add animated neon colors and higher resolution. I also changed the order of conditions slightly to separate layers into 3 groups of base color.
3. Code golfing tip
To finish I'll point out one code golfing trick that helped me fit this demo inside the Dwitter limit of 140 byte...
x.fillRect(i*T,j*T,T=18,T)
To get larger pixels for the high resolution version I needed to multiply each argument by 18. The first time I need it is not the best place to define a variable cause I'd have to use parenthesis. What we can do is use a variable that has already been declared in the boilerplate. We don't need Math.tan in our demo so I chose the provided shorthand T. When fillRect is first called it doesn't draw anything cause T is not a number. The second time and from then on the value of T is 18.
I hope you enjoyed this article. Would love to see your work on Dwitter too!
Follow me on Twitter if you want to hear of new demos and blog updates - @jylikangas


Ei kommentteja:
Lähetä kommentti